
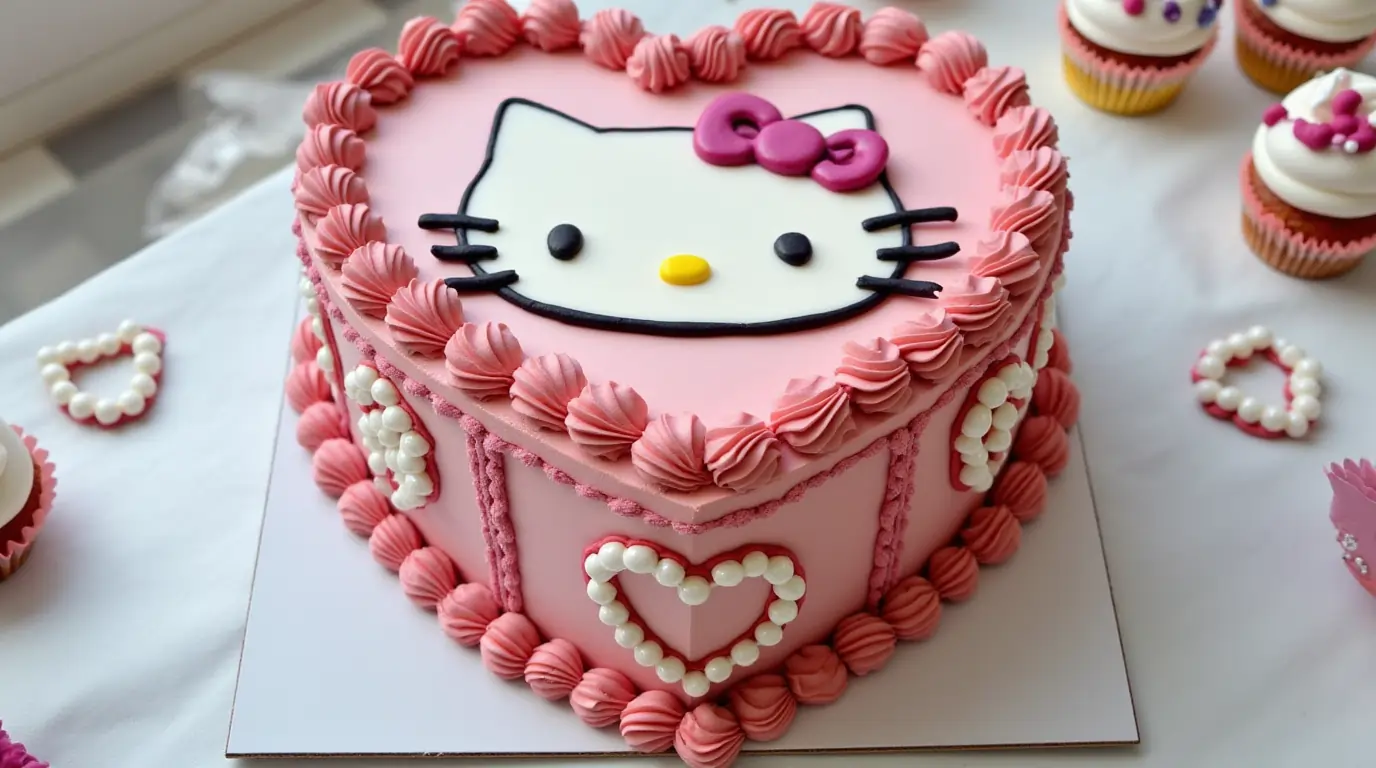
Hello Kitty has remained a beloved icon for decades, capturing the hearts of both kids and adults with her timeless charm. From themed birthday parties to casual celebrations, a Hello Kitty cake is the perfect centerpiece that adds a touch of whimsy and fun to any event. Whether you’re hosting a birthday bash for a little one or surprising a die-hard Hello Kitty fan, this cake will surely bring smiles to everyone’s faces.
In this blog post, we’ll walk you through a simple, step-by-step process to create your Hello Kitty cake at home. Even if you’re a beginner baker or have never decorated a cake before, don’t worry—we’ve got you covered with easy tips, detailed instructions, and creative ideas.
This guide focuses on using accessible materials, tools, and techniques, so you don’t need to be a professional pastry chef to achieve a professional-looking result. By the end of this tutorial, you’ll have a delightful Hello Kitty cake that looks fantastic and tastes even better.
Table of Contents
Materials and Tools You’ll Need
Before diving into the step-by-step process of creating your Hello Kitty cake, it’s essential to gather all the materials and tools. The procedure will go more smoothly and be more pleasurable if everything is prepared. Here’s a detailed list of what you’ll need:

Cake Ingredients
- Cake Base: You can choose between a classic vanilla or chocolate cake, depending on your preference. Both options provide a sturdy base for decoration and complement the buttercream or fondant beautifully.
- Buttercream Icing: Essential for layering and crumb-coating your cake. A smooth buttercream also serves as a base for fondant or can be piped for decorations.
- Fondant: Use white fondant for the main design and smaller portions of colored fondant (e.g., pink for the bow, black for the eyes) for accents. Pre-made fondant is convenient, but you can also make your own.
- Food Coloring: Gel-based food coloring works best for achieving vibrant colors without altering the texture of the icing or fondant.
Tools
- Piping Bags and Tips: Great for adding intricate details like Hello Kitty’s whiskers or outlining features. A small round piping tip works well for fine lines.
- Cake Tins: A round cake tin is ideal if you’re shaping Hello Kitty’s face manually. Alternatively, you can use a Hello Kitty-shaped cake mold for convenience.
- Fondant Rollers and Cutters: A fondant roller helps achieve a smooth, even surface for covering the cake. Fondant or cookie cutters can be used for precision when creating shapes like Hello Kitty’s bow.
- Offset Spatula: Makes spreading buttercream or smoothing fondant much easier and more professional-looking.
- Edible Markers: Use these to draw fine details like eyes, nose, and whiskers directly on the fondant.
Optional Decorations
- Cake Toppers: Pre-made Hello Kitty toppers can save time and add extra flair to your cake.
- Edible Glitter or Sprinkles: These can enhance the festive look of your cake, especially for a birthday celebration.
- Decorative Ribbon: Wrapping a decorative ribbon around the base of the cake adds a polished, elegant touch.
Baking the Perfect Cake Base
The foundation of any great cake is its base, and for a Hello Kitty cake, having a sturdy and flavorful cake is essential. Follow these steps to bake a perfect cake base that’s not only delicious but also easy to decorate.
Step 1: Choosing the Right Flavor
The flavor of your cake sets the tone for the entire experience. Here are some popular options:
- Vanilla Cake: A classic choice that pairs well with almost any frosting or filling. Its neutral flavor allows the decorations to shine.
- Chocolate Cake: Rich and indulgent, chocolate provides a delicious contrast to sweet buttercream or fondant.
- Fun Variations: For a twist, consider strawberry, red velvet, or marble cake to add extra excitement and color to the layers.
Make sure to choose a recipe designed for layered cakes, as these tend to be denser and more suitable for stacking and decorating.
Step 2: Preparing and Baking the Cake Layers
- Preheat Your Oven: Set the temperature according to your recipe’s instructions, typically 325°F (163°C) to 350°F (177°C).
- Prepare Your Cake Tins: Grease your tins thoroughly and line them with parchment paper to ensure the cakes release easily.
- Mix the Batter: Follow your chosen recipe, being careful not to overmix, as this can make the cake dense.
- Divide the Batter Evenly: If making multiple layers, divide the batter equally between the tins for even baking. Use a kitchen scale for precision.
- Bake: Place the tins in the center of the oven and bake for the time specified in the recipe. Check the cake’s doneness with a toothpick; if it comes out clean, it’s done!
Step 3: Cooling and Leveling the Cake
- Cool Completely: Allow the cakes to cool in their tins for 10–15 minutes before transferring them to a wire rack to cool completely. Decorating a warm cake can cause the frosting to melt and the structure to collapse.
- Level the Layers: Once cooled, use a serrated knife or a cake leveler to remove the domed tops of the cakes, creating flat, even layers. This step is crucial for stacking and ensures your Hello Kitty design looks polished and professional.
- Wrap and Chill: If you’re not decorating the cake immediately, wrap the layers tightly in plastic wrap and chill them in the refrigerator. Chilled cakes are easier to work with and less likely to crumble.
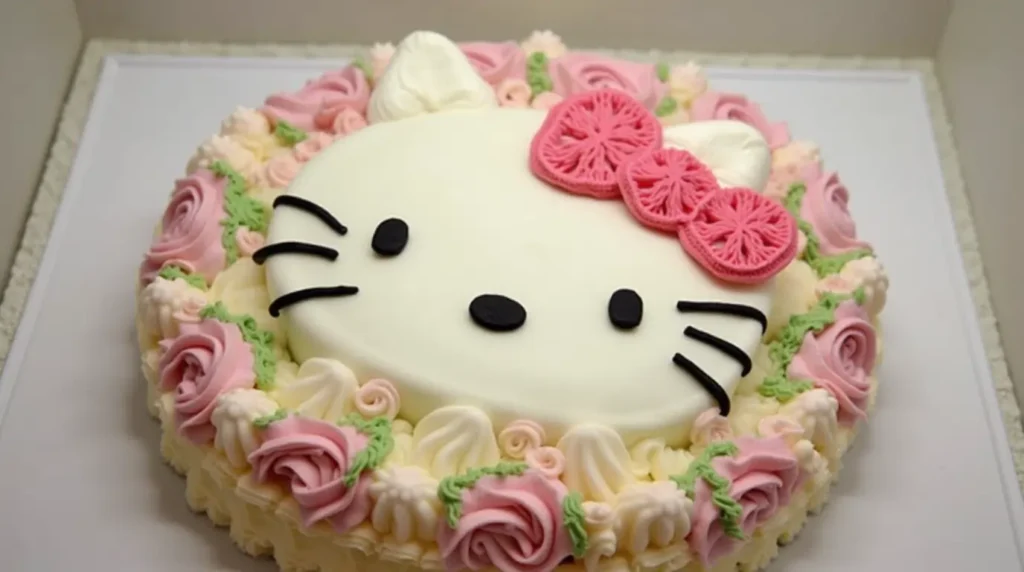
Creating the Hello Kitty Design
Transforming your baked cake into the iconic Hello Kitty design is the most exciting part of the process! Whether you’re using a cake mold or shaping it by hand, this step is all about creativity and attention to detail. Here’s a breakdown to help you craft the perfect Hello Kitty face.
Step 1: Preparing the Base for Decoration
- Crumb Coat Your Cake: Start by applying a thin layer of buttercream over the entire cake. This crumb coat seals in crumbs and provides a smooth surface for the final layer of frosting or fondant. Chill the cake for 20–30 minutes to set the crumb coat.
- Choose Your Base Covering: Decide between buttercream and fondant. Fondant provides a clean, smooth finish perfect for Hello Kitty’s signature white face, while buttercream offers a softer, more textured look.
- Dye the Icing or Fondant: Use gel-based food coloring to tint small portions of fondant or buttercream pink for the bow and yellow for the nose. Keep the base covering white for authenticity.
Step 2: Shaping the Cake into Hello Kitty’s Face
- Using a Cake Mold: If you have a Hello Kitty cake mold, simply pour the batter into the mold before baking. After cooling, the cake will already have the iconic shape, making this step a breeze.
- Shaping by Hand: If you’re starting with a round or rectangular cake, use a template or freehand cut the shape of Hello Kitty’s face.
- Start with a basic oval for the head.
- Cut two small semi-circles for the ears and attach them to the top of the head using buttercream as an adhesive.
- Smooth the edges with a knife or spatula for a cohesive look.
Step 3: Adding Hello Kitty’s Signature Features
It’s time to make Hello Kitty a reality now! Focus on the details to capture her iconic appearance.
- Eyes: Use small black fondant circles or pipe black buttercream dots for the eyes. Place them symmetrically, about halfway down the face.
- Nose: Roll a small ball of yellow fondant and flatten it slightly to create the nose. Position it centrally, just below the eyes.
- Whiskers: Roll thin black fondant strips or pipe black buttercream lines on each side of the face for whiskers.
- Bow: Roll pink fondant into two small triangles for the bow loops and a circle for the knot. Arrange them on one ear to complete the look. For extra flair, add polka dots or glitter to the bow.
Optional Customizations
- Add a border around the base of the cake using piped buttercream or a decorative ribbon.
- Personalize the cake with the birthday person’s name or a message written in edible ink or piped icing.
- Incorporate themed sprinkles or edible glitter to make the design pop.
Decorating Tips for a Stunning Hello Kitty Cake
Decorating is where your Hello Kitty cake truly comes to life! Whether you’re a beginner or an experienced baker, these tips will help ensure your cake looks professional, polished, and irresistibly adorable.

Tip 1: Mastering a Smooth Finish
- Using Fondant:
- To keep your fondant from sticking, roll it out on a spotlessly clean, lightly powdered surface. Aim for a uniform 1/8-inch thickness.
- Carefully drape the fondant over the chilled cake and smooth it down using your hands or a fondant. Trim the excess fondant at the base using a sharp knife or pizza cutter.
- To avoid cracks or air bubbles, work slowly and gently. If you spot air bubbles, use a clean pin to release the air, then smooth the area with your fingers.
- Using Buttercream:
- After applying the crumb coat, add a thicker layer of buttercream to cover the cake completely. To smooth the surface, use a bench scraper or offset spatula.
- For added flair, create texture with the back of a spoon, spatula, or a patterned cake comb.
Tip 2: Achieving Precise Details
- Eyes, Nose, and Whiskers:
- For sharp, clean lines, use edible markers or a fine piping tip with black icing.
- Roll fondant into small, consistent shapes for features like eyes and nose, and place them carefully using tweezers or a toothpick for precision.
- The Bow:
- To make Hello Kitty’s signature bow stand out, dust the fondant with edible shimmer powder or add tiny fondant polka dots.
- If using buttercream, pipe the bow in layers, starting with the outline and filling it in for a three-dimensional effect.
Tip 3: Enhancing the Design with Colors and Patterns
- Color Matching: Stick to Hello Kitty’s signature color palette of white, black, pink, and yellow for an authentic look.
- Gradient Effects: Use an airbrush or blend two shades of pink for an ombre effect on the bow or base decorations.
- Polka Dots and Stripes: Add fun patterns to the bow or background using contrasting colors of fondant or icing.
Tip 4: Adding Final Touches for Extra Appeal
- Edible Glitter and Sprinkles: A touch of glitter or themed sprinkles can make your cake sparkle, especially for festive occasions.
- Borders and Ribbons: Create a piped buttercream border around the base or add a decorative ribbon to give the cake a polished finish.
- Personalized Message: Use a piping bag or edible ink pen to write a special message like “Happy Birthday” or the recipient’s name on the cake board or an edible plaque.
Tip 5: Ensuring Stability and Presentation
- Chill Before Serving: Let the decorated cake rest in the fridge for 30–60 minutes to set the decorations. This makes it easier to transport and ensures the details stay in place.
- Use a Cake Board: Place your finished cake on a sturdy cake board decorated with complementary colors or patterns.
- Arrange Surroundings: Decorate the serving area with Hello Kitty-themed accessories, like matching plates, napkins, or figurines, to enhance the presentation.
FAQ
How can I fix uneven cake layers?
Uneven cake layers are a common challenge but easy to resolve:
- Trim the tops of each layer with a cake leveler or a serrated knife. Work slowly for a smooth, flat surface.
- If one layer is thinner than the others, add an extra layer of buttercream or filling to even it out.
- Place the cake on a rotating cake stand to make leveling easier and more precise.
What should I do if the fondant cracks or tears while covering the cake?
Cracked or torn fondant is a common issue for beginners:
- Prevent cracking by kneading the fondant thoroughly before rolling it out to ensure it’s pliable and soft.
- If cracks appear after covering the cake, use a bit of shortening or water to smooth them out with your fingers or a fondant tool.
- Tears can be patched by blending a small piece of fondant into the damaged area and smoothing it out.
Can I make a Hello Kitty cake without fondant?
Absolutely! If you prefer not to use fondant:
- Use buttercream to create Hello Kitty’s face by piping the details. A star tip works well for textured designs, while a round tip is perfect for smooth lines.
- Create simple decorations with colored buttercream, such as piping the bow, eyes, and whiskers directly onto the cake.
How should I store a Hello Kitty cake before serving?
Proper storage keeps your cake fresh and decorations intact:
- Store the decorated cake in the refrigerator, especially if it contains perishable ingredients like buttercream or fresh fruit filling.
- Cover the cake loosely with plastic wrap or place it in a cake box to protect it from drying out.
- Remove the cake from the fridge 1–2 hours before serving to let it come to room temperature for optimal flavor and texture.
Conclusion
Creating a Hello Kitty cake is a fun and rewarding way to add charm to any celebration. From baking a delicious base to crafting intricate details like the bow and whiskers, every step lets you showcase your creativity.
By following this guide, you can confidently transform a simple cake into a stunning masterpiece. Customize the design to reflect your style or the preferences of the guest of honor, and remember to enjoy the process—it’s about more than just the cake; it’s about the memories you create.
Whether for a birthday, party, or surprise treat, your Hello Kitty cake is sure to delight and impress. Share your creation with friends and family, and take pride in your sweet accomplishment! Happy baking!